Thursday, December 13, 2012

Cheese Ball Igloo and Penguins

Penguins
Aren't these just the cutest penguins? When I first made these back in 2008, I had plans to make a marching band of all eighteen penguins as called for in the original recipe. on Christmas morning. when I had nothing else to do :P. Silly girl. So, I modified my plan and made an igloo out of my favorite cheese ball recipe and smattered a reasonable amount of penguins around it. If you are equally insane, let's talk details.
Cheese Ball
Start with your favorite cheese ball recipe. Any white-ish recipe will do but this is my favorite. Reserve about 1 oz. of the plain cream cheese before you measure everything out, we're going to use that for our penguins. Mix up your cheese ball and let it get thoroughly chilled, this will make it easier to shape.

Wednesday, August 15, 2012

Initial Party

Initial Cake
This cake makes me deliriously happy. It turned out even better than I envisioned and that doesn't happen often! I started with this inspiration for an Initial Party. Then I was inspired by a bunch of different cakes that formed into one plan for this cake (more cake details, below).

I cut out a bunch of Ps in different fonts and sizes and attached them to a white tablecloth with double-sided tape.

Wednesday, August 01, 2012

Wedge Salad

Wedge Salad

Only in Texas could you create a salad so big that it requires a fork and a knife to eat it. Truthfully, I don't think that the wedge salad was created in Texas but we Texans like to claim the origin of many things :).

Wedge salads have been on the trend in the last couple of years, but if you don’t know what I’m talking about, then let me fill you in. A wedge salad consists of a big wedge of crisp lettuce (there is no room for snobbery here, only crunchy iceberg will do), drizzled with chunky blue cheese dressing (ranch dressing will work as well, if you have an aversion to blue cheese), sprinkled with sweet cherry tomatoes, crisp bacon pieces, and finished off with crunchy croutons. Have I sold you on this yet?

I came up with these croutons when I realized I forgot to buy croutons and could not bear to put myself into a hot car to go to the crowded grocery store just for one thing. We’re made of tougher stuff than that, right? We don’t need no stinkin’ store to have croutons.

Wedge Salad with Salt-and-Smoked Pepper Croutons
Serves 4 as a side dish or 2 as a main course salad

For the croutons:
1 ½  cups  large bread cubes from about 2 slices bread (mine were about 1x1x1/2 inch cubes)
2 Tbls. olive oil
1 tsp. kosher salt
1/4 to 1/2 tsp. smoked black pepper (if you can’t get smoked pepper, coarse ground black pepper will work too)

In a large bowl, toss the bread cubes with olive oil, salt, and smoked pepper. Spread the bread cubes out on a cookie sheet and bake at 350', stirring a few times, for 10-15 minutes until lightly golden and crisp. Alternatively, you can cook these over medium-high heat in a cast iron skillet for about 5 minutes, stirring often, until crisp and lightly golden. Let cool completely.

For the dressing:
2 oz. crumbled blue cheese
1/3 cup regular or light sour cream
2 Tbls. regular or light mayonnaise
¾ tsp. Worcestshire sauce
2-3 Tbls. buttermilk or regular milk

Mash blue cheese in a bowl, then mix in mayo, sour cream, and Worcestshire. Season to taste with salt and pepper. Stir in 2 Tbls. buttermilk, adding another tablespoon if it’s still too thick. You want to be able to drizzle this over your lettuce but not have it run all over the plate. It’s best if you make this at least one hour before you assemble the wedges. Cover and store in refrigerator up to one week.

For the salad:
1 large head iceberg lettuce, well chilled
12-15 small cherry or grape tomatoes
1/4 cup. crumbled cooked bacon (about 2 slices)
1-1/2 cups croutons
1/4 to 1/3 cup Blue Cheese or Ranch Dressing

Peel off the first couple of outer leaves of your iceberg lettuce. With the bottom of the iceberg facing the counter, give your iceberg a sharp smack on the counter to release the lettuce core. This should make it easy to flip the lettuce over and remove the core. Cut the iceberg in half lengthwise, then cut one half into 2 wedges for a main dish salad or 4 wedges for a side salad. Place lettuce wedges on a plate and drizzle each wedge with 2-3 Tbls. dressing for a big salad or 1-2 Tbls. for a side salad. Sprinkle with bacon crumbles, cherry tomatoes, and croutons. Sprinkle with additional pepper if desired.


Monday, July 02, 2012

Menu Plan

Broiled Fish Fillets; Watermelon, Orange, and Feta Salad; Corn Fritters

Fajitas, Guacamole, Sauteed Peppers and Onions

Buffalo Chicken Meatballs, Buttered Noodles, Roasted Brussel Sprouts

Blueberry Sour Cream Pie

Frozen Grapes (not really a recipe, but if you hadn't tried this, do! So much healthier than a popsicle.)

Wednesday, June 13, 2012

Lemon Tuna Avocado Snack

Tuna Snacking Meal

It all starts so innocently. You're going along, happy with your life, having no urges at all. Soon you find yourself sneaking quick looks when no one else is watching, hastily turning away if they make eye contact; you don't want anyone to think you're a weirdo! You peek in the windows of "those" stores but aren't brave enough to go in yet. You might buy a magazine or two but you hide them under a stack of books next to your nightstand, only taking them out when your husband is working late. Eventually you have to admit it to yourself...you want to have a baby!

This was me 12 years ago after we had moved into our first house. I had the baby bug bad. I bought every Martha Stewart Baby magazine that was published and pored over the pages anticipating knitting little sweaters (I didn't know how to knit then), embroidering little shirts (I didn't embroider then, either), mentally filing details of nursery decorations (this was pre-Pinterest, people), and dreaming of what kind of pregnant woman I would be.

About now you're probably asking what on earth my gestational longings have to do with tuna and avocados! Hang in there, it's all a rich tapestry. This recipe was in the very first Martha Stewart Baby magazine I bought and I pictured myself as a madonna of glowing health, eating only the "right" foods and having a fit baby "bump" which would of course always be very stylishly dressed. Yeah, the reality of it wasn't really like that (high heels in my 15th month of pregnancy, what was I thinking?!). I never made this recipe EITHER of the times I was pregnant, but 12 years and 2 babies later, I finally got off my procrastinating tookus (what was I so busy doing back then!?) and made this.

This is not only a great meal for an expectant mother, but also a great light lunch for anyone. It's also lightning quick to throw together and whether you're an expectant mom, a sleepless mom of a newborn, or a taxi-service busy mom, that is a welcome recipe indeed. If I want this to be a more substantial meal, I add some fruit or cheese and crackers on the side. I also usually double or triple the recipe 'cause Lord knows someone in this house is always needing to be fed! ;)

Lemon Tuna Avocado Snack
only very slightly adapted from Martha Stewart Baby, Spring 2000
Serves 1

1 ripe avocado
1-2 Tbls. lemon juice
1 teaspoon extra-virgin olive oil
1 six-ounce solid albacore tuna, in spring water
1 tablespoon sunflower seeds
Salt and freshly ground black pepper

Drain the tuna and set aside. Cut the avocado in half and scoop out some of the inside leaving about a 1/4-inch shell of avocado in the skin. Mash the scooped out avocado in a bowl, then gently mix in the tuna, olive oil, lemon juice, and sunflower seeds. Salt and pepper to taste. Scoop the tuna filling back into avocado shells and serve.

Sunday, June 10, 2012

Menu Plan


Fish Tacos with Cabbage Slaw, Pico de Gallo

Grilled Cherry and Pecan Chicken Sausages, Zucchini-Scallion Fritters

Logan's Salt-Baked Potatoes

Seared Tofu with Date Barbecue Sauce

Buttermilk Bacon Pralines (Happy Father's Day, Dad!)

Banana Bread Crepe Cake with Butterscotch

Smoked Pork Butt Sandwiches, Almond Coleslaw

Chex Mix

Saturday, May 26, 2012

Buttermilk Bacon Pralines

Buttermilk Bacon Pralines
Let me start this post by saying I am not against bacon. I L-O-V-E love bacon and I'm pretty sure I could never be a vegetarian because I love it so. I am not, however, for the gratuitous use of bacon. You see it in everything lately, from salt to popcorn to toothpaste (!). Bacon doesn't need to be in everything but it absolutely belongs in these pralines.

I found this recipe for Buttermilk Bacon Pralines while trying to put more notches on my candy thermometer. After reading the recipe, I could not get them out of my mind. This was my first attempt at pralines and they were not too hard but, dang, they are not kidding when they say to scoop these out quickly.
Cooling


The crystalline, caramel, creaminess of the pralines goes perfectly with the salty smokiness of the bacon but I put a big red light on the orange zest this recipe calls for. It does not belong in there and all those who sampled the first batch agreed. I'm a huge fan of citrus but the orange competes with the bacon and I left it out of subsequent batches.

Since this batch was a gift, I wrapped each one individually in plastic wrap affixing little stickers that I made on the computer and printed on some FedEx sticker labels to the backs.
Gift supplies Wrapped

Tied it all up with a pretty bow and sent it on it's way!
Boxed


Buttermilk Bacon Pralines
very slightly modified from Screen Doors and Sweet Tea: Recipes and Tales from a Southern Cook via Framed Cooks

1 cup granulated sugar
1/2 cup packed light brown sugar
1/2 cup buttermilk
1 tablespoon light corn syrup
1/2 teaspoon baking soda
1/4 teaspoon coarse salt
4 tablespoons butter
1/2 teaspoon vanilla extract
1 cup chopped pecans
4 slices bacon, cooked crisp and crumbled

Combine sugars, buttermilk, corn syrup, baking soda , and salt in a 3-quart heavy saucepan (this will bubble up a lot so don't use anything smaller). Stir to combine.

Attach a candy thermometer and cook over medium heat, stirring occasionally until thermometer reaches 236 degrees. This will take about 20 minutes and you will see a lot of hissing and blurping in the pot when you stir. BE CAREFUL when you stir, this stuff is HOT!

Remove candy thermometer and place pot on a heatproof surface. With a wooden spoon, beat, beat, beat, the mixture until it loses it's gloss. Sound confusing? I thought so too. I never did see a "loss of gloss." Instead,  as soon as I saw this start to get the least bit thick, I started dropping by tablespoon fulls on a piece of aluminum foil. If the mixture hardens in the pan, add a small amount of water and return to the heat until smooth and liquid again, then tart dropping them on the foil again. Let pralines cool completely on foil, at least thirty minutes.

This made about 20-24 small pralines.

Friday, May 25, 2012

Sunday, May 13, 2012

Stuffed Squashes and Mushrooms

Grilled Stuffed Mushrooms and Squash
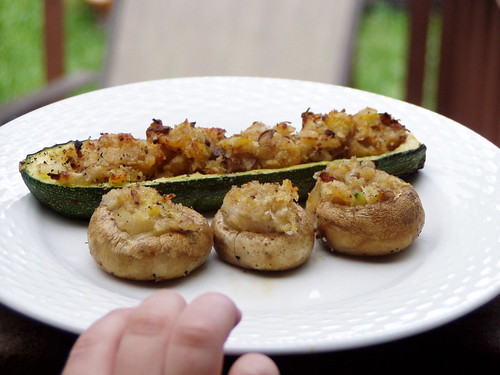
These are so good the photo assistant couldn't wait.
I adore mushrooms. Sauteed, baked, roasted, raw are all fantastic. Squash? Not so much. It's not that I don't like squash, it just never calls out to me as something I'm dying to have. This recipe changes all that. Slightly softened squash with a moist stuffing filled with herbs and cheese that gets crispy on top. Do I need to say more? Of course I do :)

This recipe is endlessly adaptable and could easily be made ahead. Who doesn't need more recipes like that? You could substitute the cheddar with almost any cheeseParmesan, Gouda, PepperJack. I think even a soft goat cheese or feta would work. You can keep it vegetarian or add cooked, crumbled sausage or cooked, chopped shrimp to make it a meal of its own. This works great with just about every squashzucchini or summer squash or pattypans.

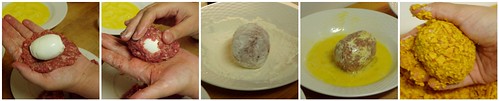
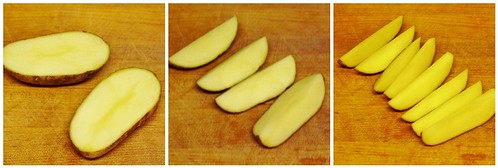
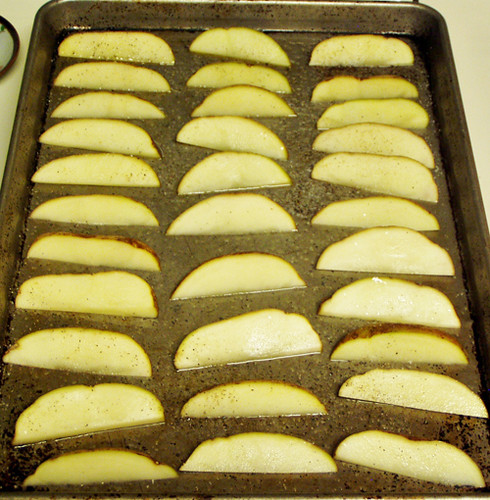
Start by stemming the mushrooms and scooping out the insides of the squash.
Squash boats
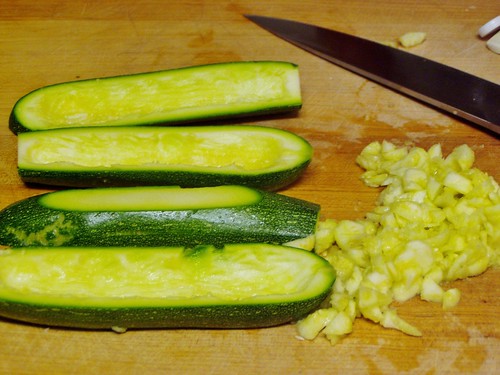
Chop up the mushroom stems and zucchini that you scooped out and saute them up in a little olive oil and butter along with some onion and garlic.

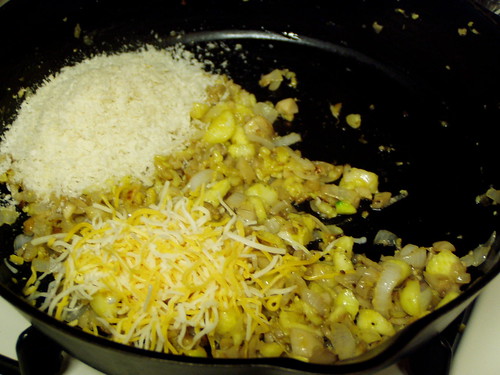
Let that cool for a few minutes, then add some herbs, cheese, and Panko breadcrumbs.
Stuffing

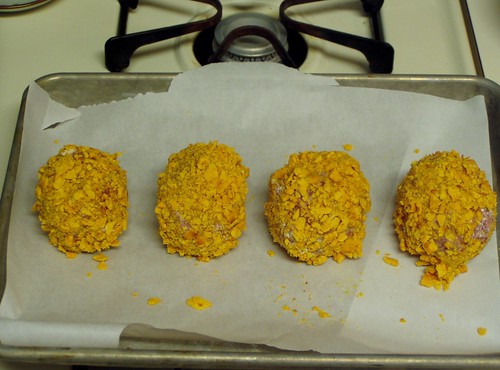
Stuff this mixture into your zucchini boats and mushroom caps.
Ready to grill
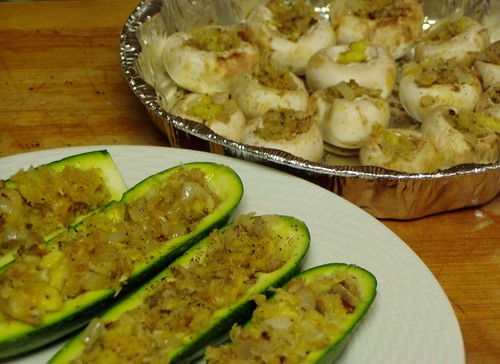
Grill and enjoy, or cover tightly and store in the refrigerator until you're ready to cook them.

Grilled Stuffed Mushrooms and Zucchini
adapted from Outdoor Cooking (Williams Sonoma Kitchen Library)

Serves 6-8 as an appetizer or 4-5 as a side dish

4 small zucchini, pattypan, or summer squashes
1 8-oz package button mushrooms
1 Tbls. olive oil, plus more for brushing squash and mushrooms
1 Tbls. butter
1/2 cup chopped onion
1 clove garlic, chopped
1/2 cup shredded cheddar
1/2-2/3 cup panko breadcrumbs
1 Tbls. fresh or 1 tsp. dried herb of your choice (oregano, thyme, italian seasoning, basil or rosemary would all be good choices, but if using rosemary, I might cut the amount by half)
1 Tbls. cream, optional

Remove the stems from the mushrooms and set aside. Cut each squash in half lengthwise, then remove a little sliver from the bottom of each half so the squash will lay flat. Using a small spoon (a small melon baller or grapefruit spoon works great for this), scoop out the interior of the squash, leaving about an 1/4-inch of shell. Place squash and mushrooms on a baking sheet and brush the insides  and outsides with olive oil. Turn everything right side up and season with salt and pepper.

Coarsely chop the scooped out squash and mushroom stems. Melt butter and olive oil in a medium saute pan over med-high heat. Add garlic and onion and saute for 1-2 minutes. Add the chopped squash and mushrooms. Saute for 7-8 minutes until the squash are soft and have evaporated most of their liquid, remove from heat and let cool for 5-10 minutes.

Add cheese, herbs, cream (if using), then salt and pepper to taste. Stir in the panko crumbs. Start with 1/2 cup then evaluate if you need more. You want your cooked squash mixture to be moist but not full of liquid. If you add the panko and there is no liquid in the bottom of the pan, you're good to go.

Lightly stuff the squash boats and mushroom caps with the mixture. Place the squash straight on the grill. I usually put the mushrooms on the grill in a foil pie pan but if you have a fancy grill basket that will work too. Grill over indirect heat10-15 minutes for the mushrooms and 20 minutes for the squashuntil the tops are golden and you can easily pierce the sides of the squash with a knife. Alternatively, you could bake these in a 425 degree oven10-15 minutes for the mushrooms and 15-20 minutes for the squash.

Sunday, April 22, 2012

Buttered-Popcorn Ice Cream Sundaes

Buttered Popcorn Sundaes
We love homemade ice cream but we are also pretty lazy people. Dirtying up a bunch of dishes and taking the time to cook and chill a custard base for ice cream just seems like too much work when we have a perfectly good no-cook, no-chill ice cream recipe that gets the job done. Ha! When have I ever let that stop me? I also have this darling little ice cream maker that I feel guilty about hardly ever using. It sits coldly in the freezer waiting to come out and play with all the other kitchen toys. I make a small amount of ice cream! it cries. No rock salt or ice needed! A mother can't play favorites, so I started searching for a small batch ice cream recipe and I found these Buttered-Popcorn Ice Cream Sundaes which sounded divine! Sweet and salty; cold and creamy; warm and gooey all at once.
Steeping
Start by steeping buttered popcorn (I would advise against microwave popcorn here as it has an unnatural butter oil on it that will leave this with a weird texture) in a mixture of whole milk, cream, corn syrup, and sugar.
Blending
Puree it all in the blender, then pour it into a heavy saucepan and bring to a simmer. While this comes up to a simmer, beat egg yolks with sugar and salt until thick ribbons form.
Tempering
Once the cream mixture reaches a simmer, slowly pour a small amount into the egg yolks and stir. Then add a little more hot mixture to the egg yolks and stir. Keep doing this until you've added about 1-1/2 cups cream mixture to the eggs. This will prevent your egg yolks from getting scrambled which is what will happen if you just add them straight to the hot cream mixture. Pour everything back into the saucepan and cook for a few minutes until slightly thickened.
Spoon Path
When you can swipe your finger on the back of the spoon and leave a path, it's done.
Straining
Strain into a large bowl, pressing with the back of a spoon to get it all through. You don't want to skip this step. It will strain out all the popcorn "pulp" and any egg strands that coagulated. Pour into a container, cover, and chill overnight. The next day freeze in an ice cream maker according to your maker's instructions. This yields about 3-1/2 to 4 cups of custard before freezing.
Caramel Sauce
Now on to the toppings! First up, caramel sauce.

Combine water, sugar, corn syrup, and cream of tartar in a saucepan with room to groove as this is going to bubble up a lot after you add the cream. I used a 3-quart pan.
Caramel
Cook over high heat without stirring until you see a little color starting around the edges of the pan, then start swirling the pan gently (think hula hoop motion) to even out the color and then don't move from the stove! Once the sugar starts to caramelize there are only seconds before you are at the color you want. When it reaches a deep amber color, turn off the heat.
Cream Explosion
Add butter and cream. This is always my favorite part of making caramel because it bubbles and hisses and makes me feel like a mad scientist in the lab (Mwahhahaha!). Add vanilla and salt and stir until the mixture is smooth and liquid again. Store, covered, in the fridge for up to one month.

Now for the Peanut Butter-Chocolate Halvah. When I read this recipe, I had no idea what halvah was. Turns out it is a term for a sweet, crumbly nut-butter candy.
Peanut Butter Chocolate Halvah
For this halvah, start with store-bought peanut brittle. Grind it up superfine in a food processor, add cooled melted chocolate and peanut butter and whir it up again. Dump onto a lined baking sheet and refrigerate until completely hard. After it has hardened, break it into small pieces and store in an airtight container in the fridge up to a day ahead.

When you're ready to assemble this, rewarm the caramel sauce and place a small spoonful in the bottom of each bowl. Top with a couple scoops of ice cream, then drizzle with more sauce. Add a few pieces of halvah and plop a few pieces of buttered popcorn on top.

Original recipe here at Epicurious.


Monday, April 16, 2012

Scotch Eggs

Scotch Eggs

I have a problem.

I want to tell you about these Scotch Eggs but I don't think you are going to go for it.

Most people look at me in horror when I suggest covering a hard-boiled egg in sausage then rolling it in cheese cracker crumbs before finishing them off in the oven.

Scotch Eggs
Scotch Eggs

But what if I told you that traditional Scotch Eggs are rolled in breadcrumbs and fried but these are baked. And that one Scotch egg is the equivalent of eating one scrambled egg and one small sausage patty. And that they are less than 300 calories each.

No?

Well, then you didn't hear it from me that these are outstanding with a glass of beer or as a quick, satisfying breakfast (with or without the beer). This is the tastiest thing I know to do with leftover Easter eggs. Not that I'm telling you to make these. No, Sirree.

Scotch Eggs
adapted from Better Homes and Gardens, Brown Bagger's Cookbook

1/2 pound bulk pork sausage (light is fine)
4 hard-cooked eggs, peeled
1/4 cup flour
1 beaten egg
1/3 cup crushed cheese crackers or Ritz crackers

Make yourself a dipping station with three shallow bowls or pie plates.  Place flour in the first bowl, beaten egg in the second bowl, and the crushed cheese crackers in the third one. Divide the sausage into 4 equal pieces, then flatten each piece in the palm of your hand to make a thin, thin patty. Still holding the patty in your hand, place one hard-boiled egg in the center of the sausage patty and then gently wrap the patty around the egg so that it is completely covered. This may take a little readjusting and smooshing but be gentle and you'll get it all covered. Gently roll the sausage-covered egg in the flour, then gently in the egg letting the excess egg drip off, and finally, roll the egg in the cheese crumbs. Place on a parchment-lined or foil-lined baking sheet and repeat for the other 3 eggs. Bake at 375' for 25-30 minutes. Let eggs cool then refrigerate until completely cold. Store, covered, in refrigerator up to one week.

Friday, April 06, 2012

Coffee Toffee

Coffee Toffee

I decided at the beginning of the year (call it a resolution if you must) that I wanted to learn how to make candy. Partly because it is a dying art, my mother-in-law is one of the last few of a generation that knows how to make candy; and, partly because candy making scares me and, well, there are bigger things to fear in life. :)

The first candy type thing I ever made was a caramel base for an apple and nut tart. This was how I learned the importance of not using a rubber spatula whilst making hot molten sugar. One minute I was stirring along and the next minute I was holding just the handle, the rubber having disintegrated into my Thanksgiving dessert. I was undaunted and headed back into the kitchen the next morning with complete zen calmness and confidence that it would turn out, and it did.

The next thing I tried was marshmallows, and while I am not sure those were worth the effort, they were also a success. I moved on to hot fudge and other dessert sauces and I was all good and proud of myself. Candy Schmandy, I got this all licked.

However, there was this idea knocking around in my head that because I had never made any type of candy that required cooking to a certain and exact temperature, I hadn't really accomplished anything. Instead of heading to therapy, I headed back into the kitchen armed with a candy thermometer and the candy knowledge I had researched about such fiddly terms like "soft ball" and "hard crack" and phrases like "submerge tip of thermometer without touching the bottom" (what?!) and when to stir and when not to stir.

The first recipe I tried was this amazing Coffee Toffee from Smitten Kitchen. I dumped all the ingredients right in, gave it a stir, and clipped on the thermometer. Voila! Candy in the making. Then I started to get nervous. Maybe I don't have a good enough thermometer? Why does it smell so burnt? It's been boiling a long time, why hasn't it reached 250 yet!? This was when I decided that a beer reinforcement (for me, not the candy) and an attitude adjustment was in order.

Smeared (with beer reinforcement)
Try to ignore that beer bottle back there and just look at the yummy candy.

I firmly believe that candy can smell your fear. So, I casually sipped my beer while watching the thermometer and tried to project a light-hearted I-ain't-scared-of-you vibe through the air. When it reached 250', I stirred until it got to 300'.

I poured it into my prepared pan, spread it out a little, coated it in chocolate and nuts then checked on it every five minutes like a nervous first-time mother while it cooled and you know what? It turned out great. The coffee is the perfect balance to the rich toffee and I don't have to sell you on the addition of chocolate or nuts to anything, do I?

Coffee Toffee
very slightly adapted from Smitten Kitchen


1 cup (2 sticks or 8 ounces) butter
1/2 cup light brown sugar
1/2 cup white sugar
1-1/2 teaspoons molasses (Deb says you can swap corn syrup or honey but I wholeheartedly agree with her that molasses and coffee is a winning combination)
1/4 teaspoon salt
1-1/2 teaspoons instant espresso powder
1 cup semisweet chocolate chips
1/2 cup chopped almonds (toasted first, then cooled)

Butter, or line with parchment, a 9 x 13 sheet pan. In a 3-quart saucepan, combine butter, both sugars, molasses, salt, and espresso powder. Stir together, then clip your thermometer onto the pot submerging the tip but not touching the bottom. Cook over medium heat, stirring occasionally, until the thermometer reaches 250'F, then stir constantly with a wooden spoon or whisk until the temperature reaches 300'F.

Remove candy thermometer and pour onto your prepared baking sheet. You can spread the toffee out with an offset spatula but I found that tilting the pan gently did the trick. You are going to break this into pieces anyway so don't stress about it being perfect or completely filling the pan. Sprinkle your chocolate chips on top and wait a few minutes for them to melt, then spread them evenly over the toffee. While the chocolate is still soft, sprinkle the almonds over the chocolate and wait for the whole thing to cool and harden (this took about an hour in my kitchen).

When completely cool, break the toffee into serving pieces and store in the refrigerator unless you live somewhere with a cool climate. This should store for at least two weeks in the fridge or freezer.

Sunday, April 01, 2012

Sunday, March 25, 2012

On the Menu This Week

Carrot Cake Pancakes (made these this morning, they were divine! They did take a little work, so next time I will shred the carrots and assemble the dry ingredients the night before. Make sure to follow Deb and Joy's advise about using only 2 Tbls. of batter at a time in the pan. This will make them easier to flip and cook all the way through.)

Shrimp and Caesar Salad

Maple-Mustard Glazed Chicken, Sauteed Garlic Spinach, Roasted Red Potatoes

Mini Corn Dog Muffins, Cut up Veggies and Ranch

Beef Tacos

Strawberry Shortcake

Coffee Bacon Sandwiches

Saturday, March 17, 2012

Happy St. Patrick's Day!

Leprechaun Trap Cake

We made this cake, which we saw at Not Martha last year, in the hopes that we could trap a leprechaun. Did we? Almost! When we came out this morning the trap was broken through but there was no leprechaun inside...hmmm...

Nabbed!
Nabbed!
Wait! What's this!? It looks like he tunneled out the side. Why are the crumbs that color?

Escaped

He left a rainbow inside the cake when he tunneled out!

Surprise Rainbow

Rainbow

Let's reexamine our steps and see what might have gone wrong. First we set a trap...

The trap is set

then cleverly camouflaged it...

Clever camouflaging

Who knew leprechauns ate cake? :) Better luck next year!!
(check out the amazing tutorial over at Not Martha)

Sunday, March 11, 2012

Thursday, March 01, 2012

Lasagna Cupcakes and Mini Pineapple Upside-Down Cakes

Pineapple Upside Down Cake/Lasagna Cupcakes

You surely know by now that I love to make things mini-size. Any food item sized down or made indivual is adorable. I love to knit wee baby socks and bitty baby hats, sew miniature play food, and of course my greatest achievement, two mini people :)

Sometimes this gets me in trouble because I fail to calculate the time and effort involved in rolling out 18 individual pieces of dough or measuring out 24 mini wells of cake batter, but sometimes I just can't resist!

When I saw these Lasagna cupcakes, the power of the mini compelled me! The recipe was rolling around in my head and every day I thought, "is today the day I had planned to make those lasagna cupcakes?" (yeah, I'm dorky and talk about food to myself).

I am happy to report they were not much more work than a full lasagna and most importantly they pried free from the muffin tin, saving me the hassle of taking forever to pry them out until I finally give in and chunk the whole pan into the backyard. And because I can't leave well enough alone, I decided to make another muffin tin recipe that I had been saving, Mini Pineapple Upside-Down cakes. These also were easy and plopped from the tin effortlessy (can you tell I have an issue with this?).

Layered
Layered

These mini lasagnas give everyone the best part of a lasagna, the crunchy edge piece! I doubted that one wonton in the bottom of the pan would hold these up but I should have trusted the author and just used one. I also mixed my cooked meat with my sauce instead of layering and added a second layer of noodles after the first layering because, again, I have trust issues. They were fine with the second layer but would have been fine without as well. I also didn't cut the bottom layer into circles just pushed the squares into the pan and cut circles for the second layer of noodles.

Pineapple Upside Down Cake is such a retro 60's kind of dessert that says, "Honey, let's have Doris and Stan over for cards and Pineapple Upside-Down Cake!" Queue up the rum daiquiris! These were not difficult and used either a jumbo or regular muffin tin pan. I would advise putting a cookies sheet under the tin. The syrup bubbled and ran over making a not so lovely to clean up mess in the oven.

This got me wondering how you could make a complete meal for 2 or 3 in a muffin tin...somebody please stage an intervention!

Lasagna Cupcakes
slightly adapted from The Girl Who Ate Everything

1 cup marinara sauce
3/4 pound ground beef
12 wonton wrappers (24 if you want two layers)
8 ounces shredded mozzarella
3 ounces Parmesan cheese
4 ounces Ricotta cheese
(optional) basil for garnish

Preheat oven to 375 degrees. Spray muffin tin with cooking spray. Brown beef and season with salt and pepper. Drain.

Cut wonton wrappers into circle shapes using a biscuit cutter or using the top of a drinking glass. You can cut several at a time.

Reserve 6 tablespoons Parmesan cheese and 6 tablespoon mozzarella for the top of you cupcakes. Start layering your lasagna cupcakes. Begin with a wonton wrapper and press it into the bottom of each muffin tin. Sprinkle a little Parmesan cheese, Ricotta cheese, and mozzarella cheese. Top with a little meat and marinara sauce. Use around 1-2 teaspoons of all the ingredients depending on your personal preference. 

Repeat layers ending with marinara sauce. Top with reserved Parmesan and mozzarella cheese.

Bake for 18-20 minutes or until edges are brown. Remove from oven and let cool for 5 minutes. To remove use a knife to loosen the edges then pop each lasagna out.

Mini Pineapple Upside-Down Cake

This recipe will make a batch of 6 jumbo size or 8 muffin size cakes.

Cake Ingredients:
2 eggs
2/3 C white sugar
4 T pineapple juice
2/3 C all purpose flour
1 tsp baking powder
1/4 tsp salt

Topping:
1/2 stick butter
2/3 C brown sugar
1-can pineapple rings
6-maraschino cherries

Preheat oven to 350 degrees. Spray your muffin tins with non-stick cooking spray.

In a mixing bowl, add eggs, white sugar, and pineapple juice. Beat for 2 minutes. In a separate bowl, sift together the flour, baking powder, and salt. Add to the wet ingredients and turn mixer back on for 2 minutes.

In a small sauce pan, melt the butter and add the brown sugar. Stir on low heat for one minute.

Place a pineapple ring in the bottom of each jumbo muffin tin. Add a cherry in the middle of each pineapple. Spoon over a layer of the warm brown sugar mixture. Pour cake mixture over to fill muffin tin 3/4 of the way full. If you are using regular muffin tins, you will need to cut down the rings to fit or just use pineapple tidbits.

Bake jumbo cakes for 25 minutes. Bake regular cakes for 20 minutes. You could also use a 10 inch cast iron skillet and bake for 22-25 minutes (the cake is done when toothpick in middle comes out clean).
Remove from the oven. Let cool in pan for 3 minutes. Run a knife around the edge of each cake to help loosen in case it sticks a little. Place a wire cooling rack on top, and quickly flip over on top of sheet tray to catch the extra drippings and let cool. These are best eaten warm and can reheated in the microwave. Enjoy!

Sunday, February 26, 2012

Dinner Game Plan

Apricot Pork Chops, Pan-Browned Brussels Sprouts, Roasted Red Potatoes

Grilled Steaks, Cauliflower Cakes

Slow Cooker Sweet-and-Spicy Chicken (Everyday Food, March 2012), Rice

Oven Baked Meatballs with Gravy, Kluski Noodles, Roasted Carrots

Lemon Cupcakes with Lemon Cream Cheese Frosting

Thursday, February 23, 2012

The Dinner Trenches: Baked Salmon, Roasted Potato Wedges, and Asparagus

Salmon, Potatoes, Asparagus

I know I am not alone here when I say that I hate planning meals. I love to cook, but the planning for a whole week? Not so much. In the marital years B.C. (before children) a plan wasn't really necessary and it was of no consequence if we didn't eat until 8:30. Then the wee people came along with their demands to be fed all the time and I realized I had to get more disciplined about making meals. every. single. night. Meals that are quick, nutritious, economical, and moderately liked by everyone at the table. Not a small challenge and one that I think I am not going to be able to meet week after week. It has taken me 18 years of marriage and 4000+ dinners to get it working pretty well.

I am not going to bore you with the details of how I get dinner on the table because a) why would anyone want to read that and b) that might not be the way it works for you. Instead, I am going to start sharing some posts that feature complete dinner meals that you can make quickly and sometimes in advance.

Ready? Let's get started.

P1010049

For this dinner you will need:
  • 1 pound salmon fillet
  • 1 pound asparagus
  • 4 medium size potatoes
  • olive oil
  • salt and pepper
  • the seasoning of your choice for the salmon (I used KC Masterpiece. Gourmet? no. Family Friendly? yes.)

Preheat your oven to 450' and scrub your potatoes. Cut each potato into eighths.

Potato Cuts
Coat a rimmed baking sheet with 1-2 Tbls. olive oil or canola oil. Make sure it is evenly spread over the sheet. Place the potatoes, cut side down, on the baking sheet. Leave space between each potato and do not overcrowd the pan or the potatoes will steam, not brown. Season with salt and pepper.

P1010054

Roast the potatoes on the bottom rack of the oven (for the best browning) for 15 minutes. While the potatoes are cooking, wash and snap your asparagus. I like this method better than cutting because it ensures you don't get any tough ends. Hold your asparagus close to the end of the stalk and gently bend until it snaps.

Asparagus Snap
Place a piece of foil on half of another rimmed baking sheet and lay your uncut salmon fillet on top. No need to remove the skin from the salmon. After it is cooked you will be able to cut and slide the individual portions right off the skin. Season with 1-2 tsp. of your favorite seasoning. Place your asparagus next to the salmon and drizzle with 1/2 Tbls. olive oil, then toss to coat and season with salt and pepper.

P1010060

Check the potatoes after 15 minutes to see if they easily release from the baking sheet and are browned on the underside; if not, then let them cook for another 5 minutes. If they are ready then flip them over on the baking sheet and put them back in the oven.

Place the salmon and asparagus in the oven on the rack above the potatoes and set the timer for 10 minutes. Your dinner is done when the potatoes are nicely browned on both sides. I test if the salmon's done by sticking a knife into the thickest part of the salmon and then touching the tip to my upper lip. If it is uncomfortably warm, then the salmon is done.

Make Ahead: The potatoes can be cut up and soaked in a bowl of cold water in the fridge as early as the morning of the day you want to make this. In fact, soaking the potatoes makes them even better. If you can soak them for even 30 minutes at room temp. before roasting it greatly improves the potatoes, but if you can't, that's alright too.  The asparagus and salmon can be prepped and placed in the fridge; just cover the baking sheet with plastic wrap. When you are ready to cook, drain and pat the potatoes dry and proceed with the instructions above.


Thursday, February 16, 2012

Cincinatti Skyline Chili

Cincinatti-style Chili

Chili is one of those foods that invites passionate discussion about the "right" way to do it. To add beans or not? Tomatoes or not? Texas or Midwestern style? As a card carrying Texan it shames me to say that I really love Cincinatti-style chili, particularly Skyline Chili. With beans. And tomatoes.

Skyline is a chain of restaurants, mainly in Ohio and Kentucky, started in 1949 by a young Greek man named Nicholas Lambrinides. A good portion of my mom's family is from Cincinnati ("cin-suh-natta" as my grandma always pronounced it) and I grew up hearing about Skyline Chili. I have only eaten in the actual restauraunt a couple of times, but long before the days of Amazon, visiting relatives would bring cans of Skyline chili with them.

Nicholas Lambrinides' Greek background is evident in the cinnamon and cloves used in the spice mix which create a heavenly, spicy, caramel-y aroma while the chili is cooking. Skyline chili is also traditionally served over spaghetti, reminiscent of another Greek dish called Pastitsio. It is also fantastic for chili dogs.

Spice Whirl
Spice Whirl
Skyline's recipe is a secret, of course, but a couple of years ago I experimented with copycat recipes on the internet and this recipe came pretty close.

You start by combining ground beef and water, breaking up the meat into very fine pieces as the water comes up to a simmer. This is an essential step in Cincinnati chili. The end texture and consistency should be like thin spaghetti sauce. Add finely chopped onions and garlic, tomato sauce, and a fragrant mix of cocoa powder, chili powder, cinnamon, cloves, cumin, cayenne, bay leaf, worcestshire, and vinegar. Simmer, uncovered, for a couple of hours and delight in how delicious your entire home smells. This makes a rather large batch but freezes and reheats very well. I like to freeze it in a few 1-cup portions to use for chili dogs.

When you order Skyline chili at the restauraunt it comes five ways:
1-way: just the chili
2-way: chili served over spaghetti
3-way: chili, spaghetti, and grated Cheddar cheese
4-way: chili, spaghetti, cheese, and onions
5-way: chili, spaghetti, cheese, onions, and beans
All "ways" are served with oyster crackers

Cincinnati-style "Skyline" Chili
adapted from about.com

6 cups cold water
2 lbs lean ground beef
3 Knorr Beef Bouillon Cubes
1 14-15 oz. can tomato sauce
2 yellow onions, finely chopped
4 garlic cloves, minced
1 Tbls.Worcestershire sauce
1 Tbls. unsweetened cocoa
1/4 cup chili powder
1 tsp. cayenne
1 tsp. ground cumin
2 Tbls. cider vinegar
1 whole bay leaf
1/4 tsp. ground cloves
1 tsp. cinnamon

oyster crackers for serving
cooked spaghetti to serve chili over, optional
shredded cheddar, chopped onions, kidney beans for serving, optional

Add beef and water to a 4-quart pot. Bring to a simmer while breaking up the ground beef with a fork until it is in very small pieces. Add bouillon cubes. Simmer for 30 minutes and add all the rest of the ingredients. You can serve the beans on the side, heated up, but if everyone you're serving this to likes beans, then I suggest adding one 15 oz. can kidney beans about 30 minutes before the chili is done. No need to drain, just open and tump in.

Simmer on low, uncovered, for 3 hours. Add water as needed if the chili becomes to thick.

Serves about 6

Sunday, February 12, 2012

Valentine Party Mix

We take Chex Mix very seriously in this house. My husband's grandmother used to make the original Chex Mix recipe every Thanksgiving and Christmas and we love it (including our kiddos who often come running when they hear the sound of cereal hitting a metal pan). To say my husband is a purist about the mix is putting it lightly. No bagel chips, thank you. No ranch seasoning. And you better hightail it out of town if you think you are going to suggest lemon and rosemary in Chex Mix.

Oh Target, let me count the ways I love you.
However, he also really loves Reese's peanut butter cups so I figured that cereal mixed with peanut butter and melted chocolate could be worked into the rotation. Change is good.

Meltage, Mixage, Coolage
I had this Valentine version at book club a couple of weeks ago and it opened my eyes to the possibility of using seasonal holiday sprinkles to dress up the mix. If you are crazy enough to sign up to be the room mom every year love supporting your kiddo at school, something like this is golden. You could package this up in little bags to give away or bring it for a Valentine's party. It goes without saying that it would be cute with any holiday sprinkles. I strongly recommend that you make the 1/2 recipe listed below unless you are serving this to more than a dozen people. It's pretty sweet and a little goes a long way.

Valentine Chex Mix from Betty Crocker

4 1/2
cups Rice Chex® cereal
1/2
cup white vanilla baking chips
1/4
cup peanut butter (I used natural nutty peanut butter without any problems)
2
tablespoons butter or margarine
1/3
cup powdered sugar
1/4
cup red, white and pink candy-coated chocolate candies
2
tablespoons red or Valentine-themed sprinkles
Place cereal in medium bowl. In small microwavable bowl, microwave vanilla chips, peanut butter and butter uncovered on High 1 minute to 1 minute 30 seconds, stirring every 30 seconds, until melted and smooth. Pour peanut butter mixture over cereal, stirring until evenly coated.

Place 1/2 of the cereal mixture in 1-gallon food-storage plastic bag. Add powdered sugar. Seal bag; shake until well coated. Spread on waxed paper or foil; cool about 15 minutes.

Meanwhile, stir candies and sprinkles into remaining cereal mixture. Spread on waxed paper or foil; cool about 15 minutes.

In serving bowl, mix both cereal mixtures. Store in airtight container.

Makes 11 servings (1/2 cup each)
Pin It

Friday, February 10, 2012

Chipotle Shrimp Taco with Avocado Salsa Verde

I have had tacos on the brain lately. In part because I have discovered that delicious soft corn tortillas, grilled for just a minute over a gas flame, can transform the humblest of ingredients into something crave worthy. So every couple of days I start thinking, "What can I put inside of a charred corn tortilla?" And boy are there a lot of choices, but I was on the lookout for something I hadn't tried yet, something with ingredients that my kids would never eat, perfect for lunch but quick enough to not interfere with my other current obsession.

The salsa was quick to blend up in the food processor and the shrimp only took one or two minutes to grill. I did not use the seeds of the jalapeno (I know, I'm a wuss) and it was medium spicy.  I also dialed back the salt to 3/4 tsp. kosher salt with no ill effect. In the 20+ years I have lived in Texas, I have never cooked with a tomatillo. I didn't know what I was missing! It was easy to prep and added a tangy crunch to the salsa. I am going to be looking for more ways to utilize them!


Chipotle Shrimp Taco with Avocado Salsa Verde
(barely adapted from Food Network)

Avocado Salsa:
1 small onion, quartered
1 jalapeno, quartered, seeds optional
1 garlic clove, smashed
4 medium tomatillos, (about 8 ounces) husked, rinsed, and coarsely chopped
1/2 Hass avocado, peeled, seeded, and cut into chunks
3/4 teaspoons kosher salt
1/4 cup loosely packed fresh cilantro leaves, coarsely chopped

Shrimp:
1 tablespoon olive oil
1 teaspoon chipotle or blended chili powder
1 teaspoon kosher salt
1 pound medium shrimp (about 20), peeled and deveined
8 corn tortillas
1/4- 1/3 cup queso fresco, crumbled
8 sprigs cilantro for garnish
2 limes, cut into wedges

Put the onion, jalapeno, and garlic in a food processor and finely chop. Add the tomatillos, avocado, and salt and pulse until chopped but still chunky. Transfer to a bowl and stir in the cilantro.
Heat a stovetop or outdoor grill to medium-high. Mix the olive oil, chipotle or chili powder, and salt in a large bowl. Add the shrimp and toss to coat. Grill the shrimp until translucent, about 1 1/2 to 2 minutes on each side.

Grill tortillas, until slightly charred and pliable, about 20 seconds per side*. (Alternatively, wrap in a damp paper towel and heat in a microwave.) Spoon sauce on the tortilla, then top with about 2 or 3 shrimp, a generous half tablespoon of cheese, and a sprig of cilantro. Serve 2 tacos per person, with a lime wedge on the side.

*I'm very sure that if you do not live in a place where spring starts intermittently in February, that you could cook these shrimp in a hot cast iron skillet and char your tortillas over the gas flame of your stove burner.