
Cold ingredients
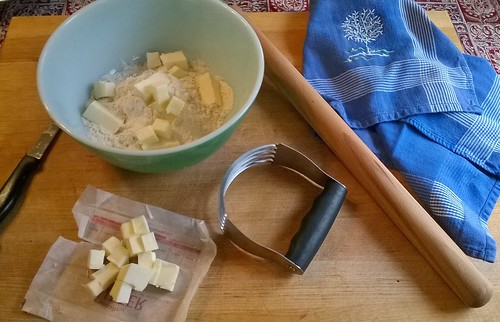
The most essential factor to crust success is cold ingredients. You want your butter and liquid to be icy cold. Some people even freeze or refrigerate the dry ingredients or freeze the butter then grate it into the dough but that's a little overkill in my book. Just make sure your dry ingredients are mixed and ready before you get out your butter and you'll be fine. I like to fill a measuring cup with water then add ice to it and let that sit while I mix together the dry ingredients.
Adding fats
You can use a food processor to cut the butter into the dry ingredients but I am not a fan of this method as 1) it requires you to have a food processor and 2) it's too easy to obliterate the butter into the flour which prevents uneven size clumps of butter in your dough and this is actually something you want, let me explain why. The sought after tenderness and flakiness in pie crust is created by the butter coating and "shortening" the gluten strands. The cold moisture in the butter evaporates during cooking creating puffs of steam in between the layers of dough (think of something laden with butter like puff pastry or croissants--maximum flakiness, right?) so uneven clumps of butter in your dough create pockets of delectable flakiness. This will naturally occur if you incorporate the butter by hand. I like to use a pastry blender but only because I have hot hands that always warm the butter too much but you can just use your impeccable clean hands like this: Get your fingers on in there and give it a smoosh, every time you feel the butter, let it go, and smoosh again, working your way around the bowl until the butter is in pea size lumps. If you feel that your butter is getting warm at this point, you can put it back in the fridge until it's cold again.

Adding liquids
You want to add the liquid with as little mixing as possible. Once liquid gets in there, gluten strands start to form. Short gluten strands equal tenderness. Start with the minimum amount of liquid (minus any ice cubes that haven't melted yet!) in the recipe and gently, but minimally, mix it into the dry ingredients. Add more liquid if necessary 1 Tbls. at a time until it starts to form a dough. You are looking for very few dry crumbs on the bottom of the bowl but not as wet as if you were making a bread dough or cookie dough. That said, it is better to err on the side of too wet rather than too dry.
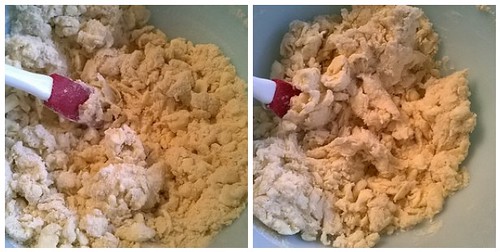 |
| L: First addition of water. R: After 2 more tablespoons of water were added. |
Plop your dough onto a piece of plastic wrap, flatten it gently into a disk, and wrap tightly in the plastic. Refrigerate for at least 30 minutes to let the liquid absorb into the flour, let the gluten rest, and let the butter get cold again. Pie dough can be made up to two days in advance and kept in the fridge, well wrapped, until ready to use or frozen for even longer storage.
Rolling it out
One of my favorite Julia Child quotes is, "You are the boss of that dough." It's imperative you believe this. You will plop your beautifully cold pie crust out onto a lightly floured surface and you will roll away in confidence knowing that not only will it not stick to the counter but you will successfully get it into the pie plate without tearing. Er, most of the time. Remember what I said about perfection?
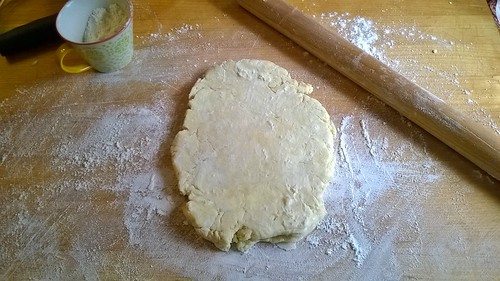
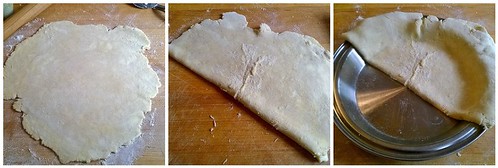
Start by lightly flouring the rolling surface, the rolling pin, and the dough. Starting in the middle of the dough roll up and away from you one time, come back to the middle and roll towards you one time. You want to roll in a + shape then in an X shape always starting from the middle, like so:
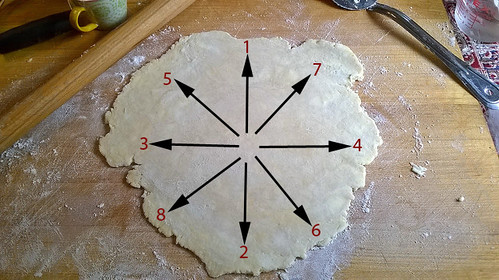
Keep the rolling pin and the dough lightly floured as you roll and keep that floured spatula moving under the dough after every couple of rolls and you should be able to prevent it from melding to your rolling surface.

Once you have a roundish shape that is an inch or so bigger than your pie plate, fold your dough in half, and gently lift it into the pie plate centering it as much as possible. Unfold the crust and fold under the raw edges. Crimp the edges of the crust by fluting, flattening with a fork, or twisting. I prefer fluting as it's quick and doesn't dirty another utensil.
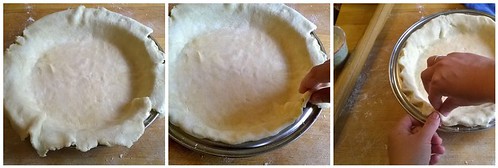
Voila! Your pie crust is ready to fill, bake, and impress!
No comments:
Post a Comment