
A lot of people are intimidated by using yeast to make bread. I used to be one of those people. Then I had a recipe breakthrough last Thanksgiving that resulted in my making 5 dozen Parker House Rolls for dinner. Then I went on to make dozens of delicious, ooey, gooey, maple icing-drenched cinnamon rolls for gifts last Christmas (that's a story and a recipe in the works, my friends!).
So what happened to turn me from yeast-a-phobe to baking queen? Forgetfulness.
As a person ages, and increases the number of her brood, she may becomestone cold crazy with lack of sleep and free time and often wander into a room only to forget the point of being there or call her child by the other child's name (ooohooo, how I used to make fun of my mom for this--payback is a biotch) slightly less able to keep track of details. So, I forgot about the dough rising in the kitchen and let it go for at least an extra 30-45 minutes before I remembered it. And you know what I realized? The rising time is just a GUIDELINE! All these years that I had been turning out barely risen, tough, dense bread was mostly because I didn't leave the yeast to do its thang. I also think it helped to gain confidence by making little rolls. For whatever reason, they seem less daunting than forming and shaping one big loaf.
As a person ages, and increases the number of her brood, she may become
Now let's talk about the three things that I (and maybe you) had been ignoring when it comes to successful yeast bread baking:
1. Unless you have baked many, many times with yeast, use a thermometer to check the temperature of your liquid ingredients. So many recipes instruct you to use hot or warm-to-the-touch water. That means nothing if you are not an experienced baker. You want your liquid ingredients to be between 95°F and 110°F. If you are using ingredients in addition to milk or water, like eggs or butter, remember to let them warm to room temperature so they don't bring down the temperature of the liquid you heated. That said, it's always better to err on the side of caution and have your ingredients too cold as too hot ingredients will kill the yeast and there's no coming back from that.

2. You are not kneading long enough. This always seemed the trickiest part of bread making to me. Recipes often say, "Knead until a soft, smooth dough forms." Huh? How will I know that? The only thing I can tell you here, is that whether you are using a luxury item like a stand mixer or doing this by hand (which I should so that I wouldn't have jiggly old lady arms) you need to knead for at least 5 minutes. Proper kneading is important because it elongates the gluten strands in the flour and gives lots of lovely arches for the gas created by the yeast to get trapped. When you bake bread, you are freezing those arches in place, so no long, lovely strands of gluten equals no airy, light bread structure. I use my Kitchenaid with the dough hook attached and let it mix for about 7-10 minutes on Speed 2. Then, because I have some kind of tactile issues but no work ethic, I flop it out onto the counter and knead it for another minute (be careful how much additional flour you add here, slightly sticky dough is better that dry, tough dough).
3. You are not letting the dough rise as long as it needs to so that it has doubled in size. I know, I know, I'm a slave to the instructions, too. If it says it will take an hour, then I do it! But I have had dough be completely doubled in an hour and other times it has taken as long as 2 hours. Rising time will depend on the temperature of your ingredients (if they were colder it will take longer), the warmth of your kitchen, and my favorite airy-fairy concept of all: how much wild yeast is in the air in your kitchen. Apparently if you bake with yeast a lot, there is more wild yeast floating around in the air and it contributes to faster rising times. Some bakers like to let their dough rise in giant measuring cups so they can see when it's doubled. I'm ok with eyeballing it and when in doubt, letting it go a little longer.
 |
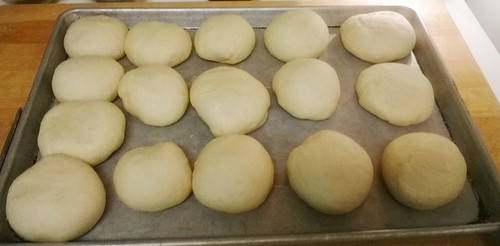
| Dough at 30 minutes, 1 hour, and 1.5+ hours because, uh, rising interfered with nap time |
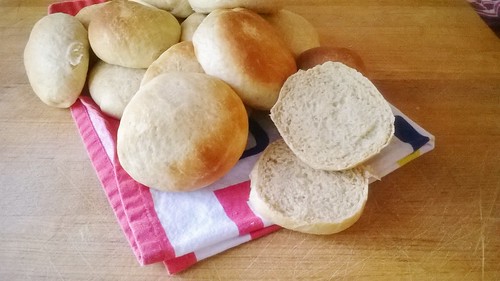
Now that you are bored to tears with the science behind bread making let's get to making a great recipe I found that makes delicious hamburger and hot dog buns but these would also be great dinner rolls or buns for any kind of sandwich.
Beautiful Burger Buns
adapted slightly from King Arthur Flour
3/4 to 1 cup* lukewarm water (about 95 to 100 degrees)
2 tablespoons butter, softened plus 2 Tbls butter, melted, for brushing on top
1 large egg, room temperature
3 1/2 cups unbleached, all-purpose flour or 1 cup white whole wheat flour and 2 1/2 cups unbleached all purpose flour
1/4 cup sugar
1 1/4 teaspoons salt
1 tablespoon instant yeast (or active dry yeast) (I don't even waste time with the little packets. I buy the jar of yeast and keep it in the fridge but if you are using the packets, know that 1 packet = 1 1/4 tsp. yeast. I was able to find instant yeast in my regular store next to the active dry yeast).
*I used the full amount of water because of the white wheat flour.
Mix and knead all of the dough ingredients — by hand, mixer, or bread machine — to make a soft, smooth dough.
Coat your bowl with a tiny bit of oil and place the dough in the bowl and cover it with plastic wrap, and let it rise for 1 to 2 hours, or until it's nearly doubled in bulk.
Once it's risen, deflate the dough, and divide it into 8 (giant buns), 12 (regular buns), 16 (lunchbox or slider size), or 24 (dinner roll size) equal pieces depending on what size buns you need. Shape each piece into a round ball; then flatten slightly with the palm of your hand.
Place the buns on a lightly greased or parchment-lined baking sheet, cover loosely with plastic wrap, and let rise for about an hour, until very puffy. Preheat your oven to 375°F about 15 minutes before the second rise is up.
Brush the buns with the melted butter.
Bake the buns in a preheated 375°F oven for 15 to 18 minutes for 8 buns, 12-15 minutes for 12 or 16 buns, and about 10-12 minutes for 24 buns until golden.
Remove from oven and cool the buns on a rack. Wait until they are completely cool to slice.
These will keep for a day or two at room temperature. After that, wrap tightly in plastic, then freeze in a plastic bag in the freezer.